
When you’re handling dozens of client projects (or more!) at a time, there are a lot of small, day-to-day tasks that get in the way of actually completing the work. Think invoicing, billing, collecting content, answering questions, updating project statuses, tracking time spent—the list goes on and on.
A client portal can be a lifesaver when it comes to handling these tasks. It can streamline your operations, save your team time and money, and make things faster and easier for your clients.
The best part? You can add a client portal to your existing WordPress site and manage everything from a single dashboard.
Let’s take a few minutes to explore the benefits of a WordPress client dashboard and explain how to create a client portal in WordPress.
The Benefits of a Client Portal
How exactly can a client portal benefit your WordPress agency? Here are just a few ways:
- It makes it easier for clients to manage their account: Instead of having to call or email your team and wait for a response, allow clients to make simple changes on their own. For example, they could update their billing information for recurring payments, upgrade or downgrade an ongoing maintenance plan, or easily access contracts and documentation.
- You can create a duplicatable onboarding process: As your agency grows, you should be able to hand off onboarding tasks to other team members. A client portal can simplify, and even automate, everything from invoicing and recurring billing to contracts and initial content collection.
- It keeps pertinent client information in one place: Any team member can access one, central dashboard that contains all information, photos, docs, client communication, and more. This dramatically reduces client back and forth—and frustrating repetition—along with time spent filling in colleagues.
- You can guide clients to relevant project information: Instead of linking a client to a Google doc over and over, just send them to their portal. Depending on how you build the client dashboard, they can access SLAs, website documentation, project timelines, contact information for their project manager, or even a live chat box or ticketing system.
- It allows clients to upload project information: There’s nothing more frustrating than trying to gather all of the content you need to actually build a website. But with a client portal, clients can easily upload everything from photos and text to PDFs and videos. This makes it easy to find everything at any point in the project.
All of this will streamline operations, add value to your offerings, and help you deliver better customer service.
How to Create a Client Portal with WooCommerce
Ready to create your agency’s client portal? There are several ways to do this, but we’ll start with WooCommerce. This method provides the most simplicity and flexibility and integrates seamlessly with your existing WordPress site.
Start with WooCommerce Core
As a WordPress agency, you’re well aware of the benefits, strengths, and capabilities of WooCommerce. When it comes to creating a client dashboard, WooCommerce allows you to:
- Sell services, like blocks of hours or website design projects.
- Create a client dashboard, with self service options for updating payment methods, editing addresses, viewing past orders, and downloading digital products.
- Include digital downloads with client purchases, like onboarding documents, templates, guides, or instructions.
All of this is default functionality with WooCommerce. Here’s how to get started:
- Install WooCommerce on your site, then navigate through the WooCommerce Onboarding Wizard.
- Set up a payment gateway and configure settings for taxes and other store essentials.
- Create your products. You’ll likely sell services, which will be either virtual (no digital items included) or both virtual and downloadable (digital items included). Sell bundles of hours, create specific products based on the client, list hosting packages, and more.
- Configure your My Account page. Go to WooCommerce → Settings and choose Accounts & Privacy at the top. Here, you can adjust settings for account creation, privacy options, etc.
You’ll likely want to customize the My Account page to better meet client needs. To do this, go to Pages → All Pages and select the My Account page.
You’ll see that the page, by default, includes the [woocommerce_my_account] shortcode block. Leave that block in place, but you can add any others that you’d like.
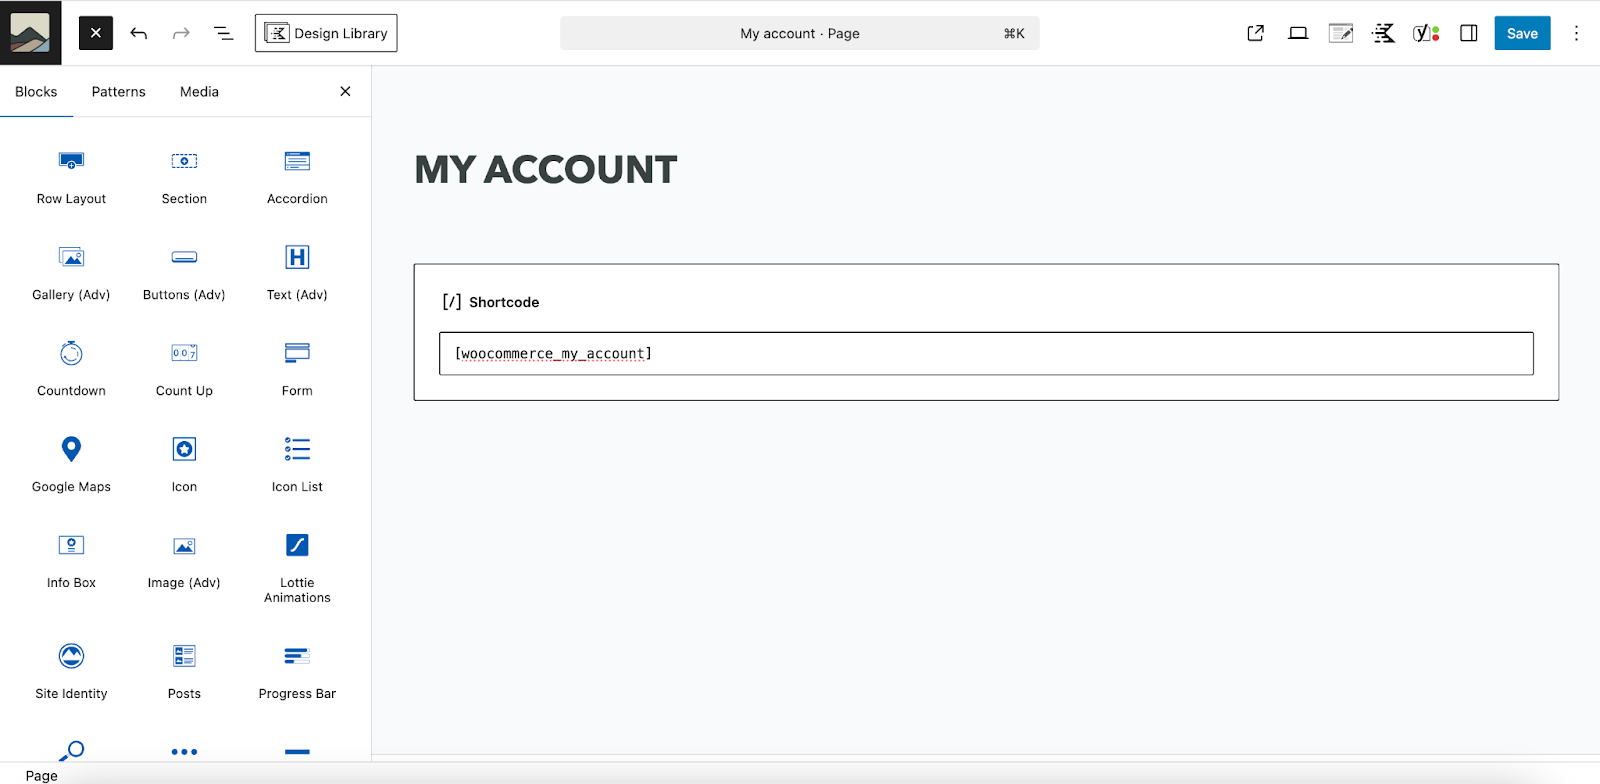
Add a contact form to make it easy for clients to reach out. Include links to documentation or onboarding processes. Or include a video that welcomes clients and provides further instructions. When you’re done, simply save the page.
This walkthrough assumes prior knowledge and is a very basic overview. For more details, check out these resources on:
Add Optional, Helpful Extensions
While WooCommerce core provides some basic client portal tools, you can use extensions to significantly enhance functionality. Here are some options, depending on your needs:
- WooCommerce Subscriptions: Charge for recurring services like website maintenance, hosting, and domain name registration. With this tool, clients can also upgrade/downgrade their plan, cancel, and make other changes directly through the portal.
- WooCommerce Memberships: Restrict access to certain products, resources, and content based on membership levels. This would be useful for providing client documentation, special resources, eBooks, videos, and more.
- My Account Page Editor: This is the end-all-be-all of client portal tools. Edit the WooCommerce My Account page, add custom information and links, move things around, customize based on user role, edit the design, let clients customize their profile, and more.
- B2B for WooCommerce: Create custom user roles for clients, hide services based on those roles, let clients request quotes, convert quotes to orders, send invoices, and more.
- Gravity Forms: Build advanced forms with conditional fields that are perfect for client onboarding. You can also use the Gravity Forms Product Add-Ons extension to add fields to the Checkout page and collect additional information from clients when they purchase a plan.
- LiveChat: Add live chat functionality to your client portal and set up chat bots to answer common questions when you’re away.
- Sensei LMS: Includes courses, instructional videos, and more in your client portal.
You can also choose from a number of support and help desk tools that sync seamlessly with WooCommerce. These allow you to provide more specialized support or even an entire ticketing system, which is incredibly useful for large agencies.
How to Create a Client Portal with Jetpack CRM
Jetpack CRM is another great option for a WordPress client portal. Powered by the Automattic team, it turns your WordPress site into a robust CRM, with features for managing contacts, sending invoices, marketing to leads, collecting information via forms, and more.
With Jetpack CRM and the Client Portal Pro extension, you can create a central hub for all of your clients. After logging in, they can accept quotes, view transactions, pay invoices, and more. You can also share files with a specific client—think wireframes, design mockups, and website instruction manuals—and make them accessible in their client portal.
Plus, you can create a task for a specific client in Jetpack CRM, and they can view and respond to that task in their dashboard. So, for example, you could ask them to sign a contract, fill out a form, submit content for a specific page, or review a wireframe. Once they’ve completed a task, you can check it off and move on to the next.
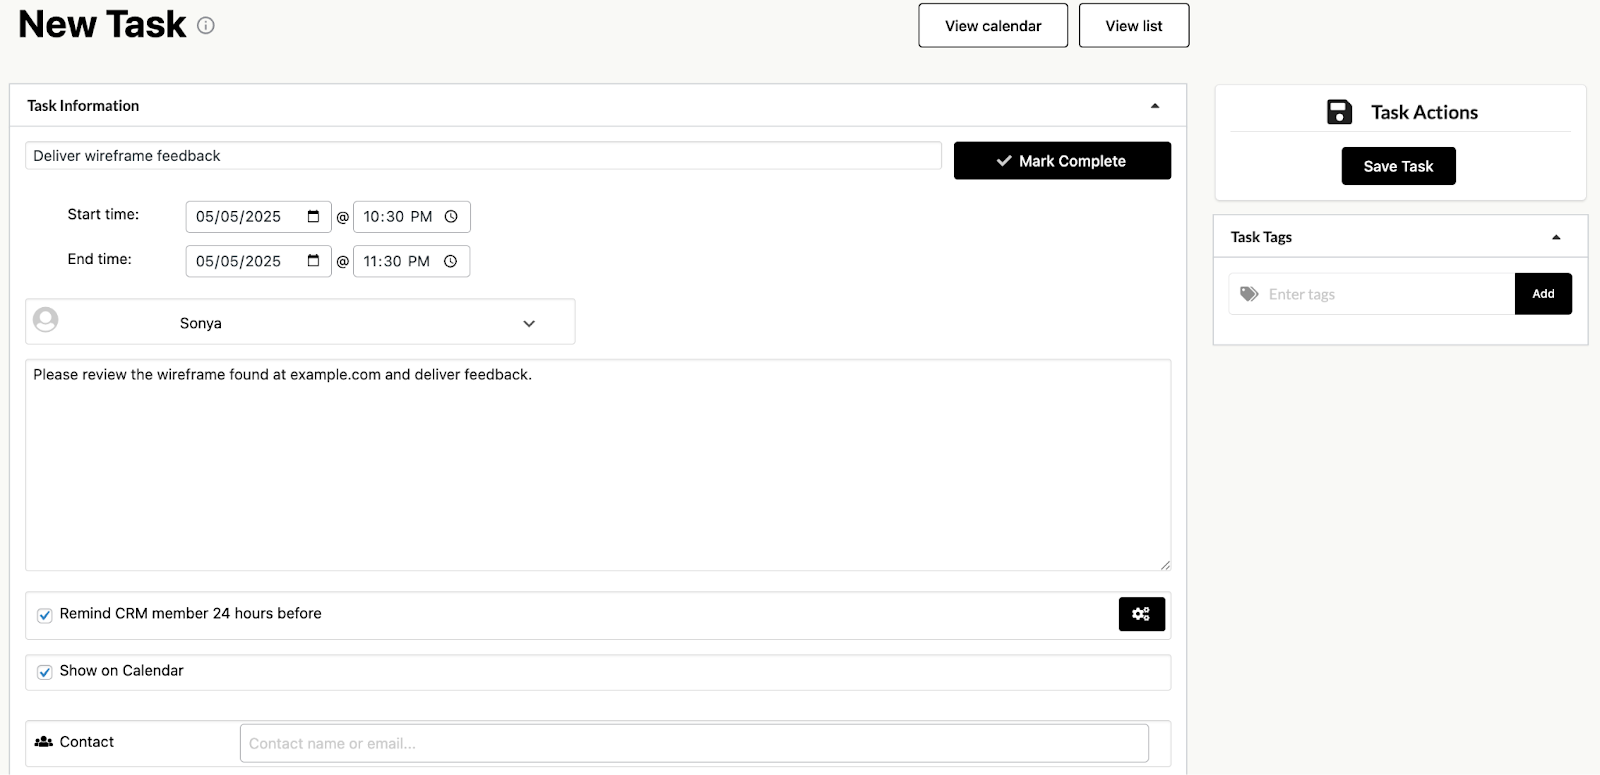
Or, assign tasks to specific members of your team and make them visible on the client portal for complete transparency.
There are also additional extensions that provide functionality for:
Plus, there are tons of great marketing capabilities that will help you grow your business and streamline your sales processes. This is an excellent all-in-one option for agencies.
For full instructions, check out Jetpack CRM’s documentation.
Client Portal Security Basics
Security should, of course, be a top priority when building a client portal. It’s absolutely critical to protect client information and communication, along with your own proprietary business data. Here are some steps you can take to secure your WordPress client portal:
- Require secure passwords: Require clients (and especially administrators) to use passwords of a certain length, with lowercase and capital letters, numbers, and symbols.
- Use two-factor authentication: This adds a second layer of protection to the login process and is particularly important for site admins.
- Set up a role-based access system: Make sure that each user has only the minimum privileges needed to complete their work or access their account.
- Install a web application firewall (WAF): This tool acts like a sentry at the door of your site, blocking bad actors from getting in.
- Scan for malware: Set up automatic malware scanning so you can respond immediately if anything ever goes wrong on your site.
- Monitor site activity: Keep an eye on the actions taken on your website and react to anything that looks suspicious.
Jetpack Security can handle the majority of these security tasks for your agency. This plan, designed specifically for WordPress, includes a WAF, malware and vulnerability scanning, an activity log, downtime monitoring, two-factor authentication, spam prevention, real-time backups, and more.
Take a look at our WordPress security checklist for a more complete guide.
Better Client Management with Automattic for Agencies
A WordPress client portal can streamline your processes, improve the client experience, and save your team time. Looking for more ways to accomplish all of that? The Automattic for Agencies program is the perfect fit.
When your agency becomes an Automattic partner, you get access to a wealth of cutting-edge tools to propel your business forward. The benefits include:
- Volume discounts on the Automattic products you already use, like WooCommerce extensions, Jetpack tools, and hosting plans from Pressable and WordPress.com.
- A centralized dashboard where your team can manage Automattic purchases and licenses, rather than navigating from account to account.
- The ability to earn up to a 50% commission when referring Automattic products to your clients.
- A build-a-cart referral program, which allows you to put together a custom cart of products and hosting for each individual client (choose from 60+ options!) and send an invoice for all of them at once.
- Placements in multiple Automattic agency directories to generate new leads.
- Dedicated, priority support from Automattic.
- Migration assistance for client sites.
Ready to speed up your processes and increase your business? Sign up for Automattic for Agencies.
